
This guide explains how to install WordPress from inside your AdminBolt Client Panel.
Step 1 - Open AdminBolt
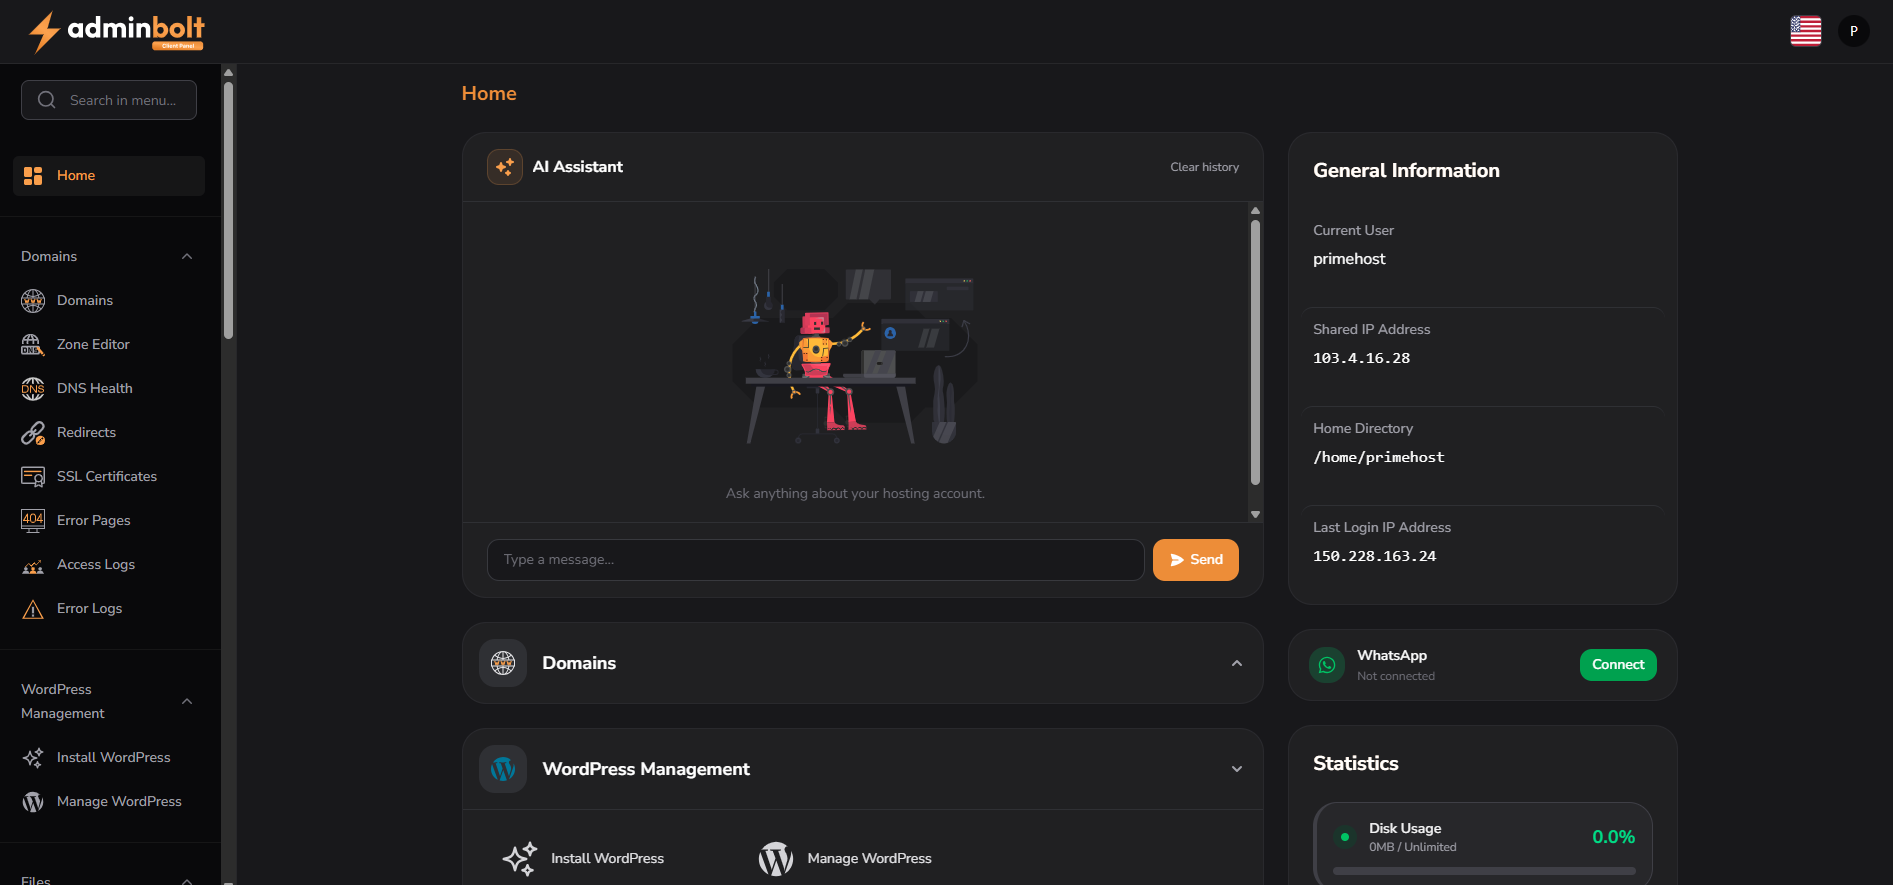
Log in to your AdminBolt Client Panel. From the Home screen, locate the WordPress Management section.
Step 2 - Click Install WordPress
In the left menu, open WordPress Management, then click Install WordPress.
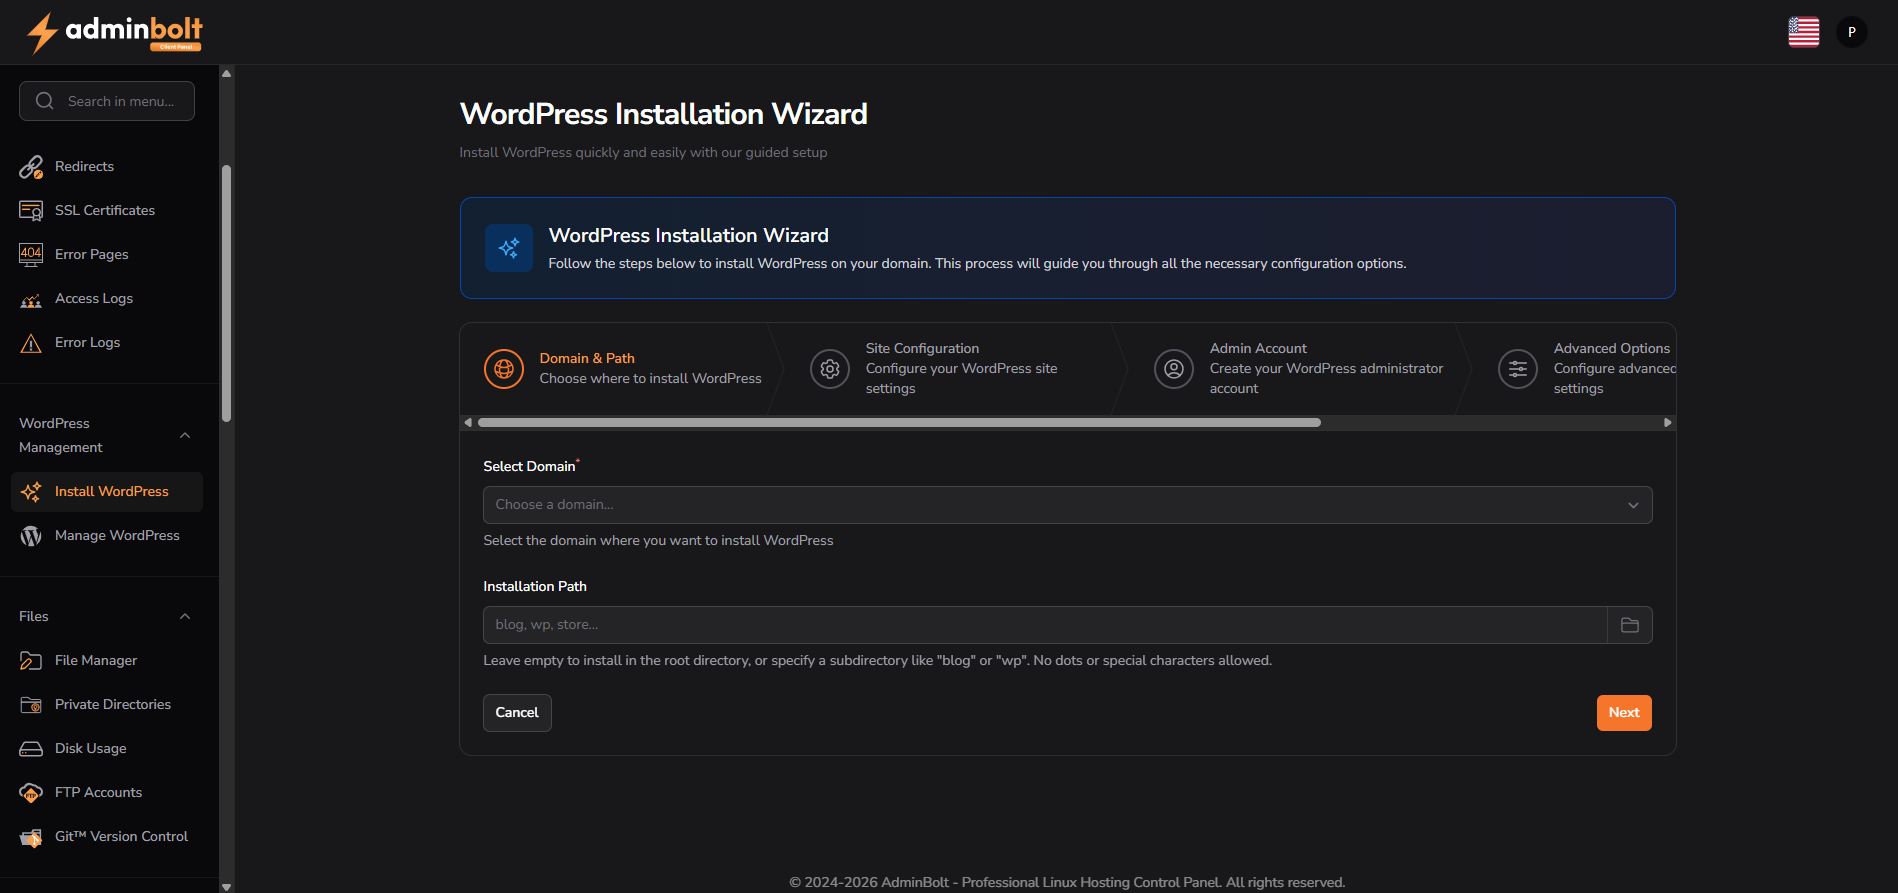
Step 3 - Select the Domain and Installation Path
Select the domain you want to install WordPress on.
In the Installation Path field:
- Leave it blank to install WordPress directly on the main domain.
- Enter a folder name, such as blog, to install WordPress in a subdirectory.
Click Next.
Step 4 - Enter Site Details
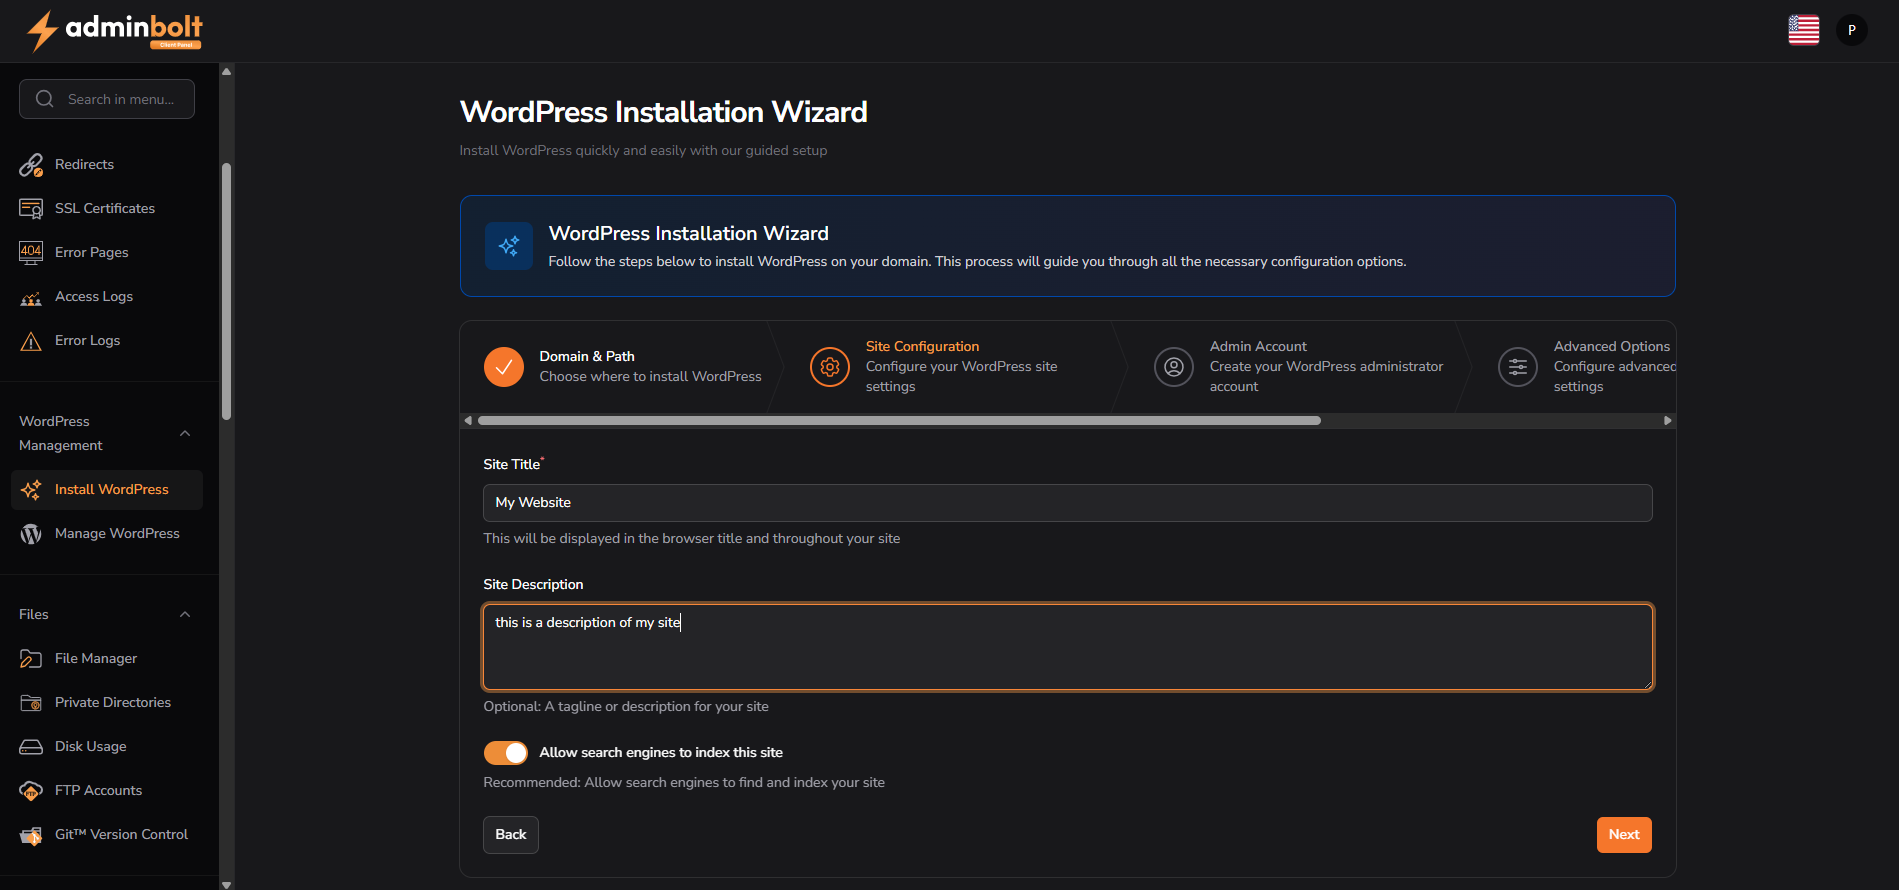
Enter your website details:
- Site Title - the name of your website.
- Site Description - a short description or tagline for your website.
- Allow search engines to index this site - leave this enabled if you want Google and other search engines to find your site.
Click Next.
Step 5 - Create the WordPress Admin Account
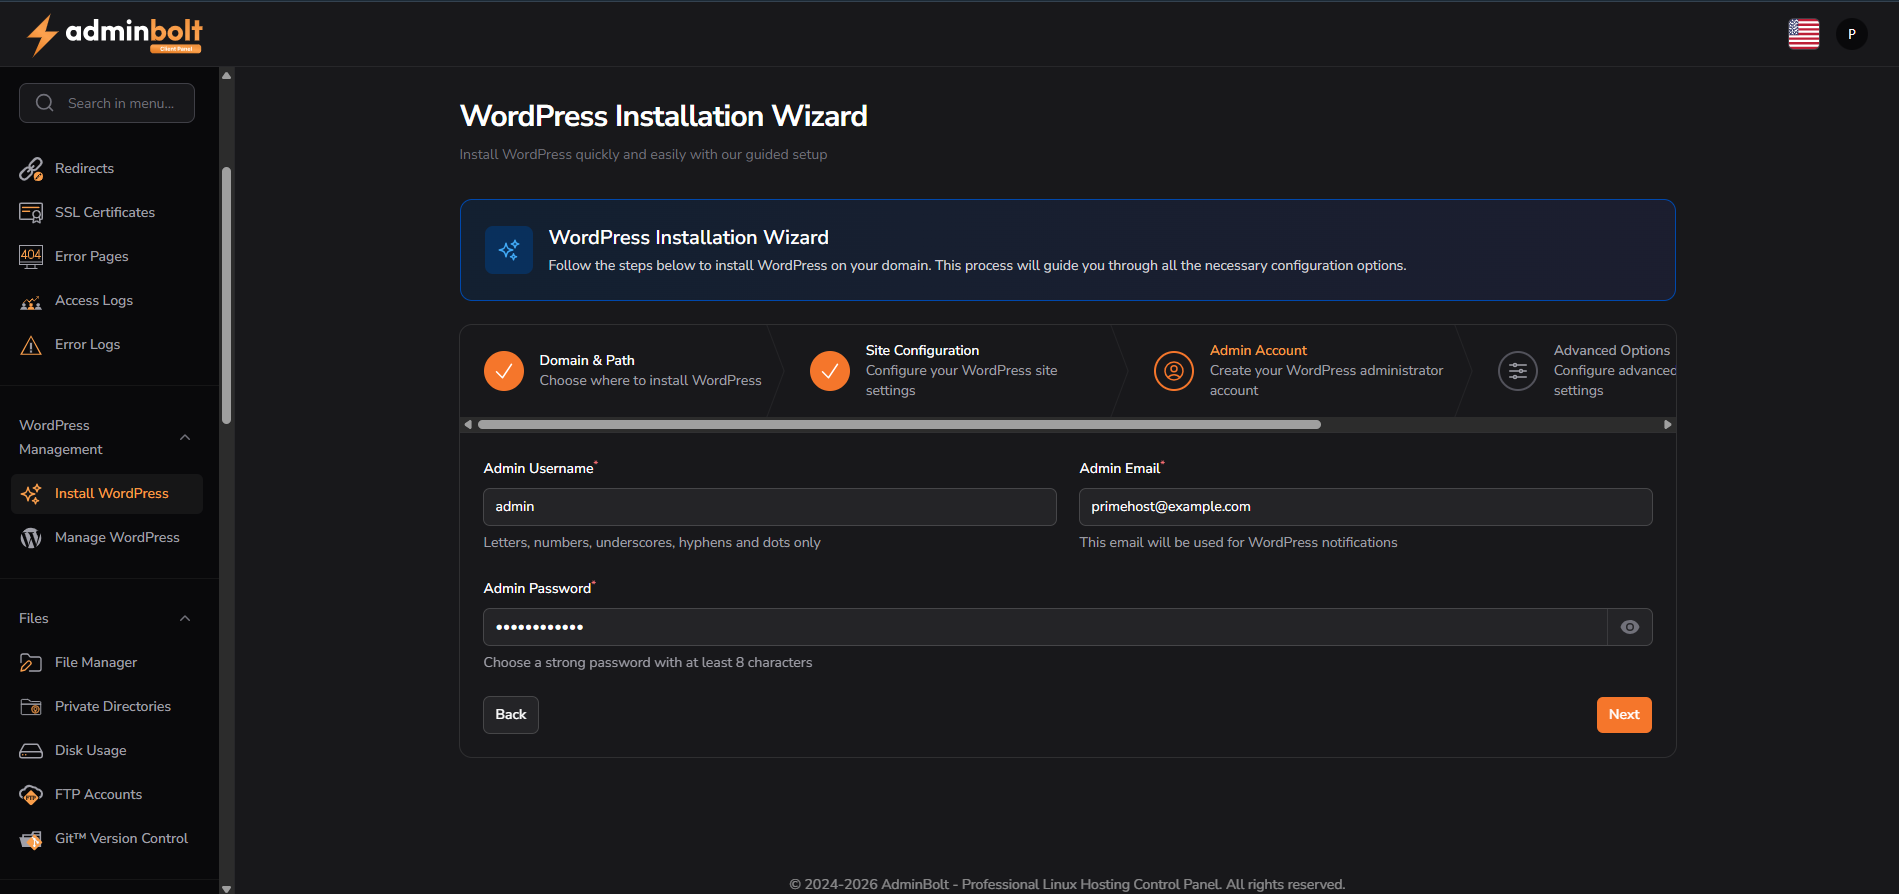
Enter the WordPress administrator login details:
- Admin Username
- Admin Email
- Admin Password
Keep these details safe, as they are used to log in to your WordPress admin dashboard.
Click Next.
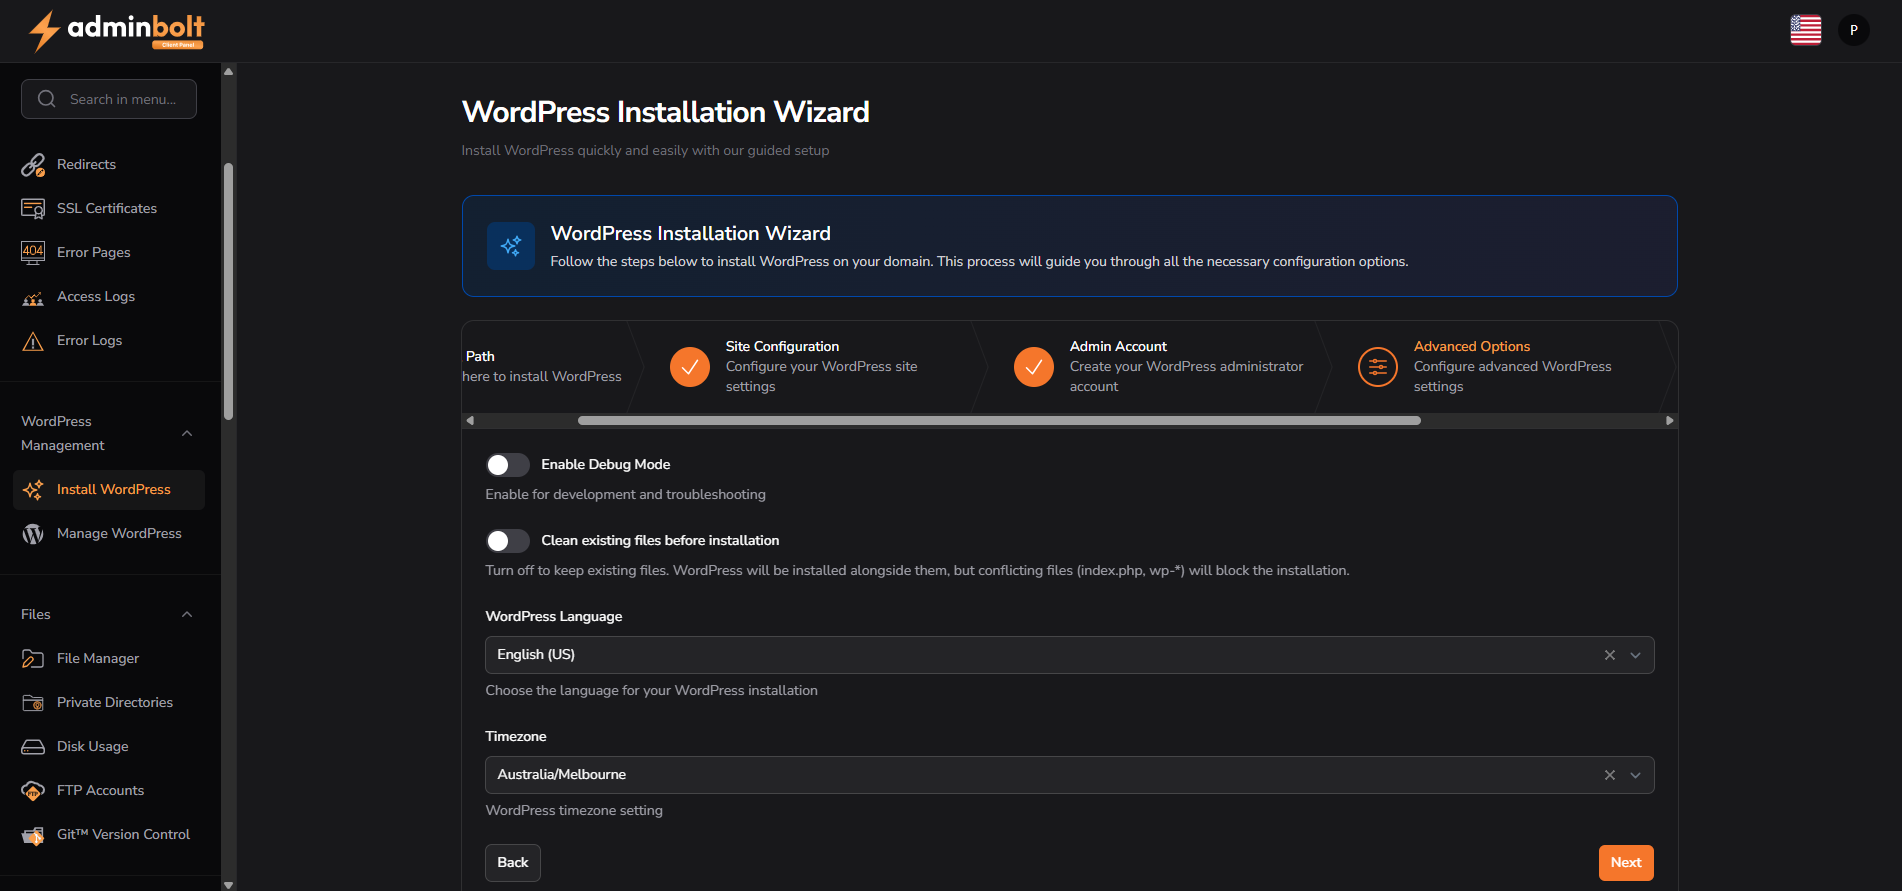
Step 6 - Choose Advanced Options
On the Advanced Options screen, you can select the WordPress language and timezone.
Most Australian users should select:
- Language: English (US)
- Timezone: Australia/Melbourne, or your local timezone
The Clean existing files before installation option should normally be left disabled unless you specifically want to remove existing files in the installation directory.
Click Next.
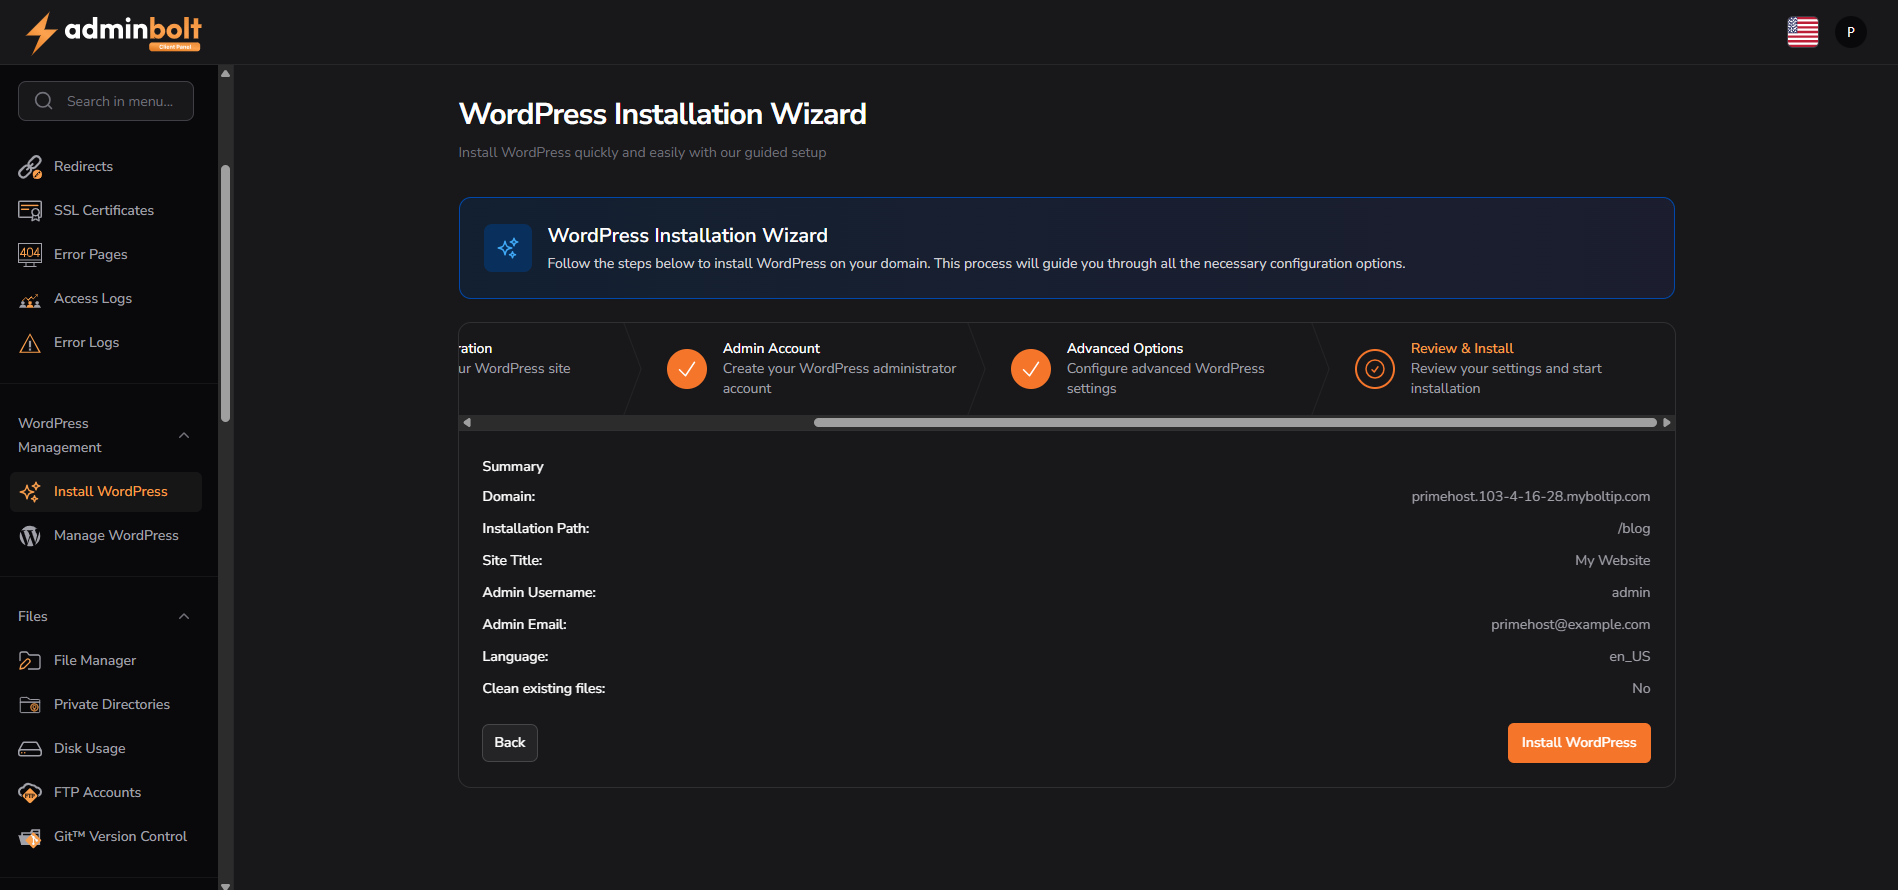
Step 7 - Review and Install
Review the installation summary carefully.
Check that the following details are correct:
- Domain
- Installation path
- Site title
- Admin username
- Admin email
- Language
When ready, click Install WordPress.
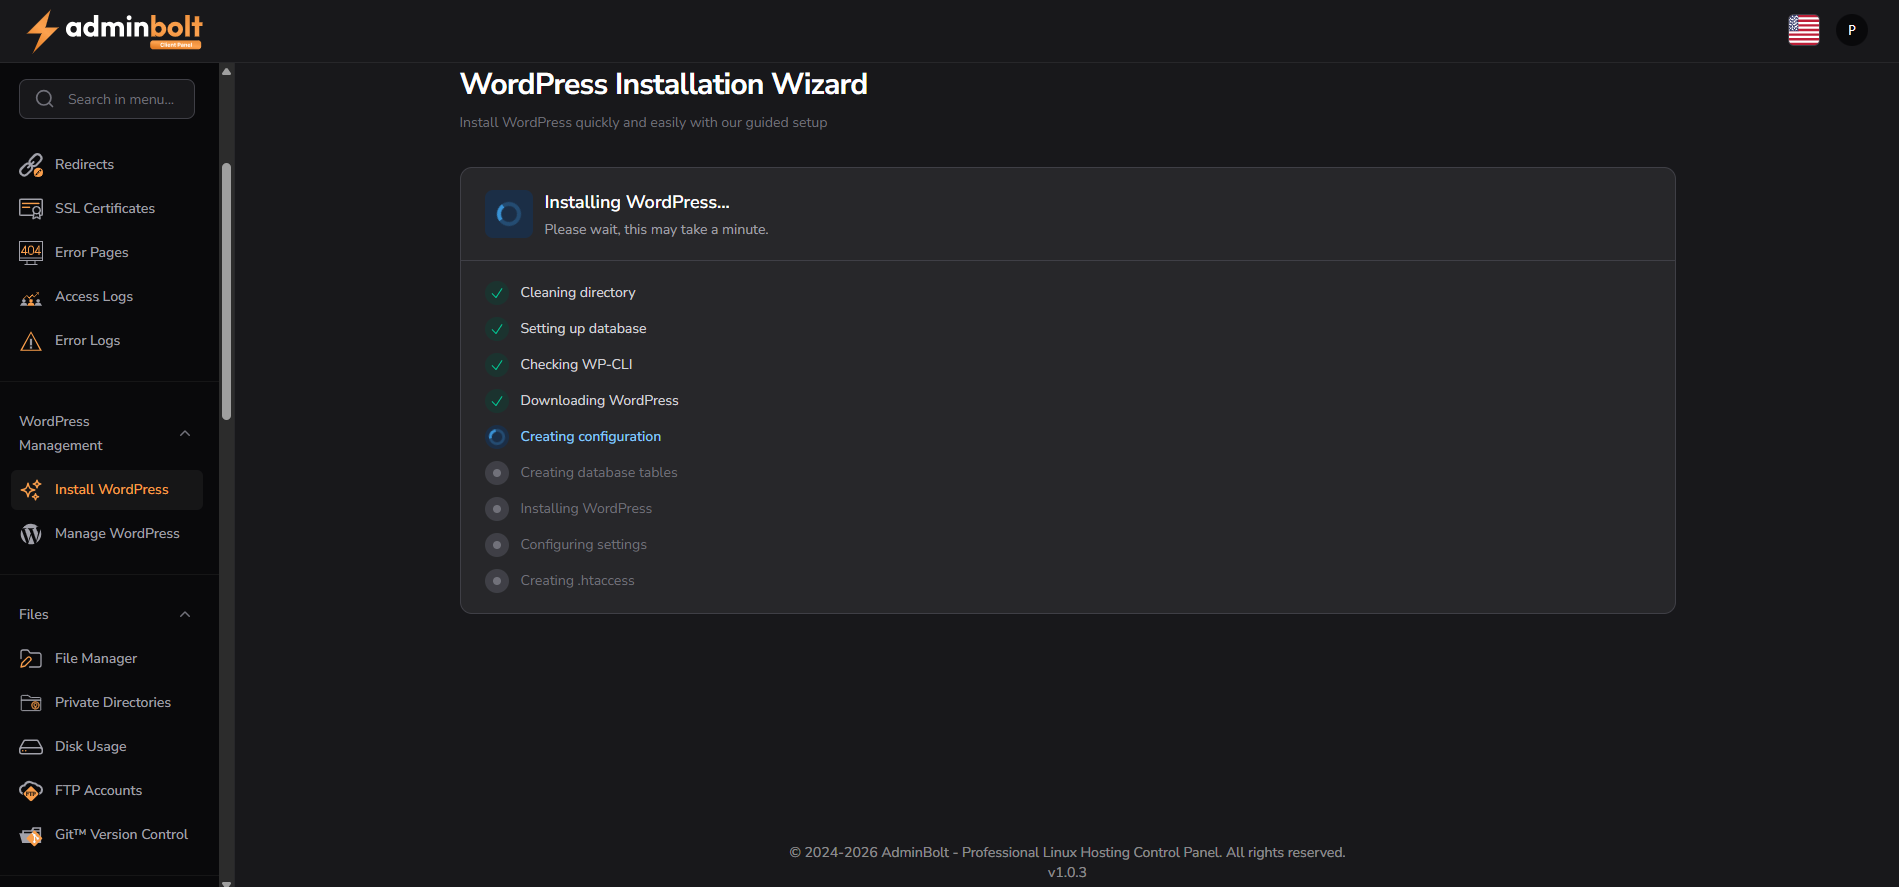
Step 8 - Wait for Installation to Complete
AdminBolt will now install WordPress. This may take a minute.
The installer will complete several tasks, including:
- Cleaning the directory, if selected
- Setting up the database
- Checking WP-CLI
- Downloading WordPress
- Creating the WordPress configuration
- Creating database tables
- Configuring WordPress settings
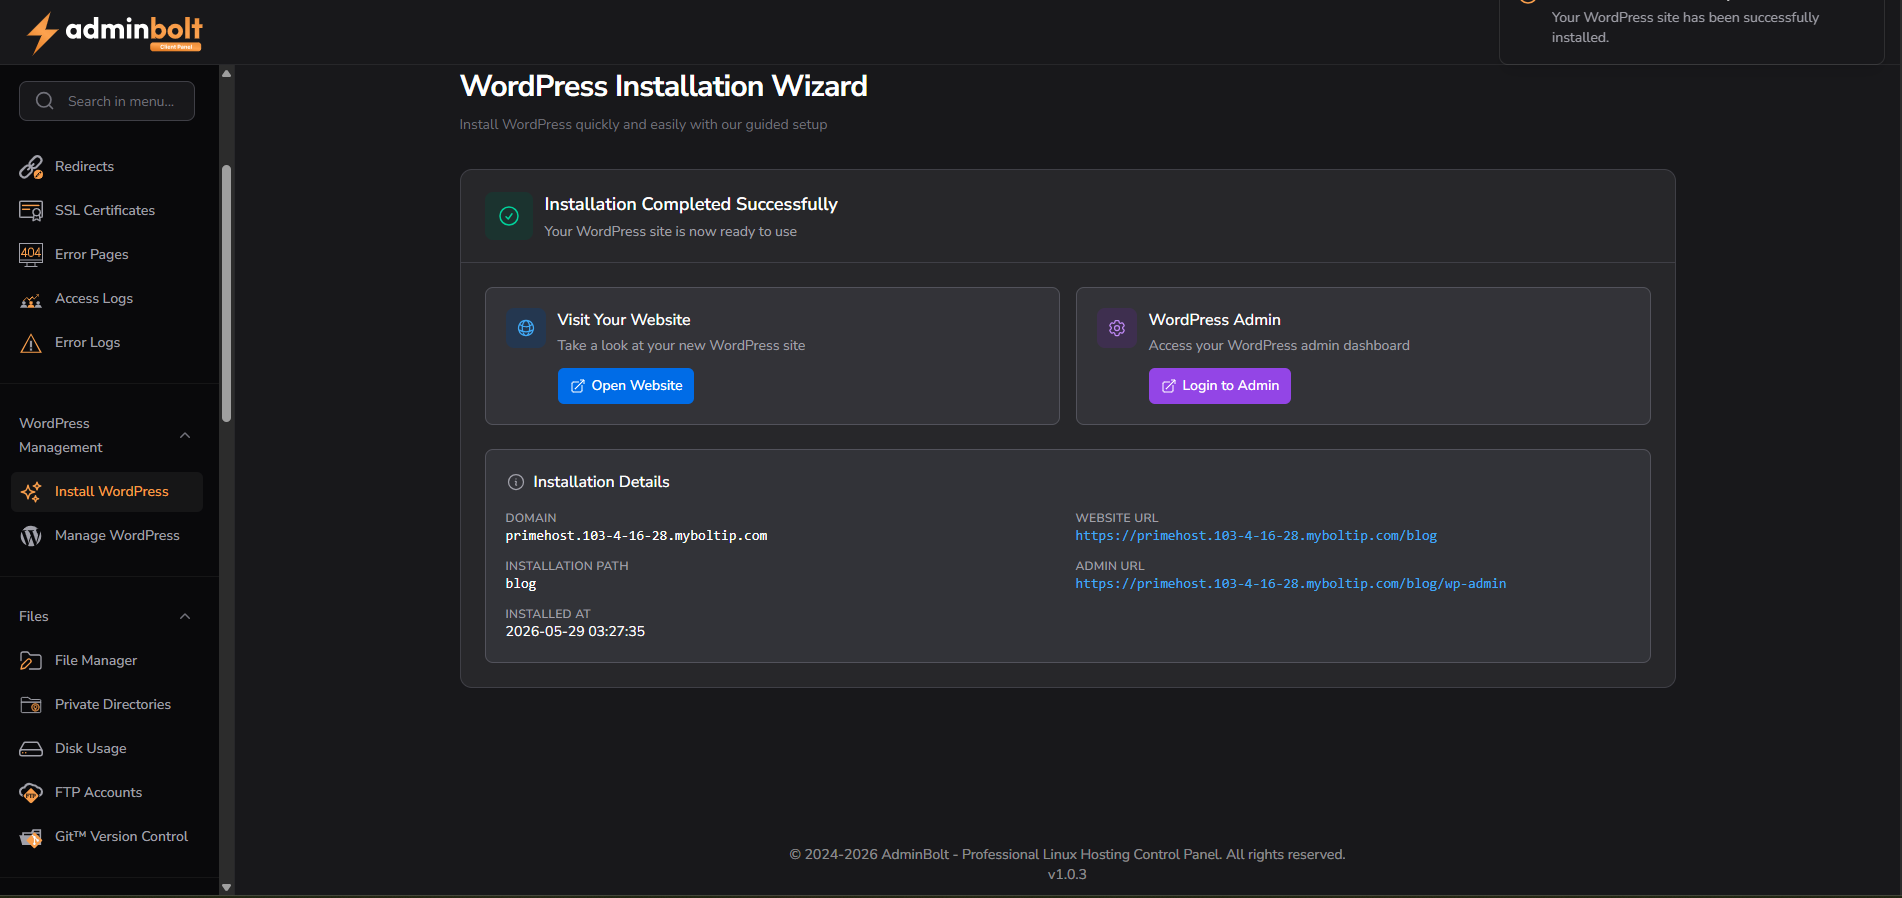
Step 9 - Installation Completed
Once the installation has completed, AdminBolt will show a confirmation screen.
From here you can:
- Click Open Website to view your new WordPress website.
- Click Login to Admin to access your WordPress dashboard.
Need Help?
If you are unsure which options to choose, or if your WordPress installation does not complete successfully, please contact our support team for assistance.